Monday, 27 February 2017

1/48 Zaku II - Part 7

Need to do some work on the upper legs. The top leg armour & the covers for the side of the knee joint followed the usual process & were primed like the rest of the kit, but I did glue in the front piece the fittings joint for the energy cables ready.

Knee covers for 1/48 Zaku 2
Primed leg armour
Primed leg armour
 
Instead of doing it like in the instructions, the hip joints were made as a normal model making & they are just 2 pieces with a poly cap in the centre. These were primed & painted in Duraluminium.
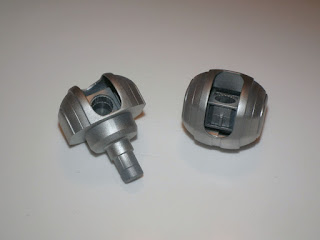
Painted 1/48 Zaku 2 hip joints
 
I know on the finished model it won’t be seen, but I like to try to give some detail to the kit, so on the knee joints I painted the inner sections in Burnt Iron & what is meant to be bolt heads in Brass.  The knee covers were given light coats of UK Azure Blue & then dry some highlights of Steel in the recesses.
Painted 1/48 Zaku 2 knee joints and covers
 
The covers for the top of the leg were painted with the darker UK Mediterranean Blue & with Steel for highlights where I thought it was needed. These & the knee covers just push into place.
Fitted top armour on Zaku 2 legs
 
To add some contrast the knee cover was primed & painted in the same Light Grey as the torso with some of the darker blue just to blend them in a bit.  All these bits now push into the already made lower legs & they are nearly done.
1/48 Zaku 2 legs nearly finished
 
All the pieces for the side energy cables were sanded & primed as before & went through the same painting process to produce the very shiny metallic blue effect.  When it comes to fitting, the cables to the legs please take great care when pushing the poly caps onto the pieces & then gently push the pieces together before putting on the model.
I tried to be smart at first by putting the large parts on the kit & then fit the small single pieces; well I pushed to hard & caught the metallic paint so had to sand & re spray one side.
The hip joints pushed into the top of the legs & now there are finished.
Finished Zaku 2 legs
The arms need to be finished now & the top armour was primed& these & the shoulder joints sprayed in the darker blue & some steel accents added to the recesses. The elbow joints had some detail work added like the knees just for my personal enjoyment.
Painted arm joints and inner frame
 
The covers for the elbow were done in light grey top follow the theme for the legs & all the pieces & the earlier lower arm parts fitted together.
Finished 1/48 Zaku 2 arms

Saturday, 18 February 2017

Part 3 :- 1/6 Harley Davidson FLH Classic

STAGES 24 & 25
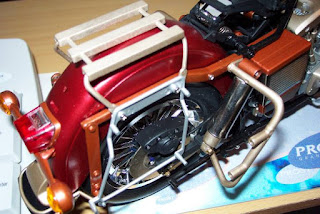
The suspension unit sits on the bike frame & rear mudguards, so I found that an elastic band fixed over the shockers held it in the correct position without putting too much pressure on the unit.  In stage 25 I decided to also fix parts G15, G21 & G22 at this stage.

Elastic band holding seat frame in position

1/6 Harley pannier frame fitted
STAGES 26 to 27
There were no problems here and just followed the colour scheme for the bike and removing anyt chrome before priming and painting.
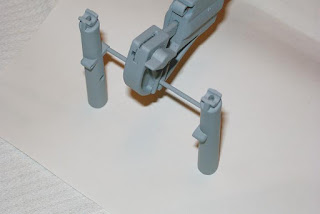
1/6 Harley Davidson front forks primed
Front forks now painted in Gold
 STAGE 28
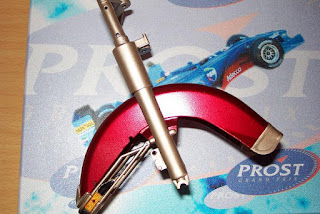
The front protective section of the mudguard & part No. F26 were sanded down, painted in gold, then the rubber & amber glass was glued in place. The front mudguard was sprayed in red to match the rear guard. Part No. G28 will be put on in the final stage.

1/6 Harley front mudguard finished in Canyon Red
Front mudguard finished in Canyon Red
STAGE 29
I followed the normal plan &only highlighted the bolts on the front wheels in purple.

STAGE 30
From here on most of the build plan will change to help with my paint scheme & I think easier fitting of parts. I cut off the lugs inside part No. N16 & N17, glue these together, without the headlight. This was so I could sand the joints then paint it copper. I then made the headlight unit as the stage says & glued it to the cover and this will be fitted later on.
I then fixed the front mudguard, screwed & glued the front protective section & parts F26 in place.
Front mudguard mounted to the forks
I then fixed the wheel in place with parts L20 & L21 painted in gold to match the forks & part No. G17 in copper as a highlight. I also fitted the front brake pipe & traced it up the forks ready.
Wheel mounted to forks on 1/6 Harley Davidson
Wheel mounted to forks on the 1/6 Harley Davidson
(PART OF STAGE 32)
For me is was easier to forget stage 31 and do the following. I fixed the front forks in place with part no’s C3 & C4 and then feed the brake pipes into the correct areas ready.

Front forks mounted to frame of the 1/6 Harley Davidson

(PART OF STAGES 30 & 32)
I found it a lot easier to fix the fairing frame & headlight unit in one go. I took the parts L39, L40, H19, H21 & G29 and painted these silver. I then placed the headlight unit over the forks & fed the cables out of the top as shown in stage 30, then glued just the top of the head headlight unit to the fork top. When dry glued/screwed the fairing frame parts to the headlight unit.

The reason for this was that it made it easier to feed the brake pipes to the correct place & the fairing frame holds the headlight unit in place.
Headlight and fairing frame fitted

 Making the rear boxes ( Stages 37 & 41 )
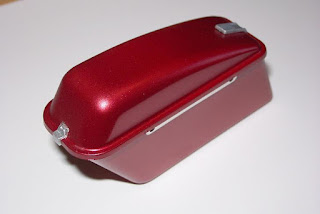
I glued parts R2 to R5 & R6 of the side boxes and S5 to S6 of the top box, primed them, then sprayed then in "Canyon red". The hinges and supports were sanded and painted in silver. the parts H4 for the side boxes were painted in gold, but will not be fitted till the final finish.
1/6 Harley side boxes finished and painted

1/6 Harley top box finished ready to fit

Tuesday, 14 February 2017

1/48 Zaku II - Part 6

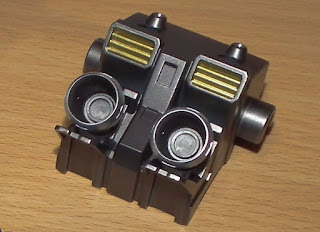
The backpack is one large moulded piece with two exhaust verniers at the bottom. The usual grey primer method for the base & some Vallejo Plate Mail primer for the verniers got them started.
Backpack of 1/48 Zaku 2 primed
The backpack was sprayed in Steel & some highlights of Duraluminium, Burnt Iron & Brass on the vents, recesses & small exhausts brought out the detail.  The larger verniers were sprayed Duraluminium then the inner section in Burnt Iron. The cover for the back panel was primed & sprayed in Light grey.
Zaku 2 backpack painted with highlights
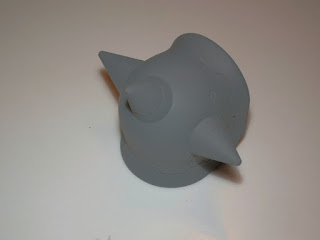
The armoured shoulder section & shield were fitted with the polycaps, glued, sanded & primed with the standard grey & allowed to dry.
 
Zaku 2 shield primed
Shoulder armour glued, sanded & primed
1/48 Zaku II shoulder armour sanded & primed
 
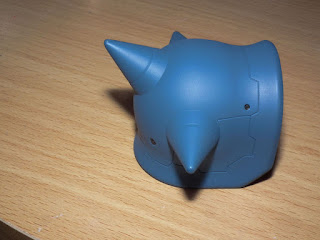
Matching the two tone blue scheme on the rest of the Zaku these were sprayed with light coats of UK Mediterranean Blue.
Shoulder armour painted & highlighted.
Finished 1/48 Zaku Shoulder armour
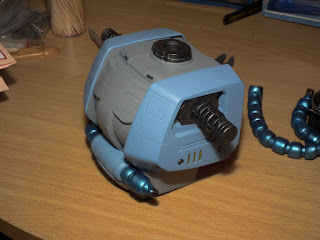
The torso now needed to be finished & with looking at the flow of the colours the upper & lower torso were sprayed with Light Grey& a few highlights with Steel on the connections & head collar that might be seen on the finished kit, but I wanted to do it for my own delight J.
 
The earlier primed side armour for the torso was painted in the paler U.K. Azure Blue & some highlights in Steel & Brass where required. The energy cables & the torso connectors did, like for the head, take a lot of time to get right & I followed the same method of Chrome base & light spray of Metallic blue (A.MIG-0196) that are just enough to provide a light blue tint.
The front cover for the energy cables was primed & painted U.K. Azure Blue & highlights in Steel.
Zaku 2 torso parts ready for assembly
 The front cable connector goes on first, and then the two sidepieces, the back cable connector & finally the front cable cover just push into place with no need for glue.
1/48 Zaku 2 side plates & connectors fitted
The inner part of the backpack goes over the rear cable connectors& then the two exhaust verniers pushed in to the bottom of the backpack.
1/48 Zaku 2 backpack fitted
With care not to scratch the painted surface of the energy cables gently, push them into place. All you then need to do is put the cover on the backpack & the main torso is finished.
1/48 Zaku 2 torso painted & finished
 

Sunday, 12 February 2017

Part 2 :- 1/6 Harley Davidson FLH Classic


STAGES 11 & 12
On stage 11 I it is advisable to allow the glue from fitting part D30 to set before you fit the spring to the bike's stand. The only difference in stage 12 is that the push rods on the engine had already been fitted back in stage 7.

Fitted stand and spring on 1/6 Harley Davidson

STAGES 13 & 14
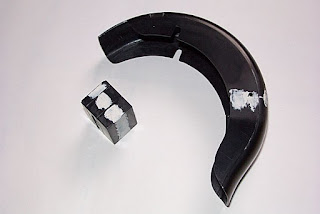
The plating on parts G19, G23, G26, F14 & F28 were removed  to allow painting.. With the rear mudguard coming in four parts filler was required at the joins, sanded down smooth & then it was primed, then sprayed in Canyon Red. The resulting finish showed no join marks & made it look like one solid unit.

Filler on tank and rear mudguards

Primed rear mudguard on 1/6 Harley Davidson

Canyon Red sprayed on rear mudguards of Harley Davidson
   All the rear lights and end pieces of the rear mudguard were glued in place to complete the rear mudguard assembly.
Complete rear mudguard assembly on 1/6 Harley Davidson

STAGES 15 & 16
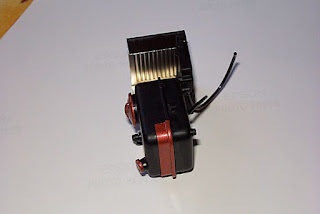
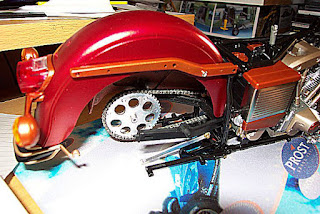
This is the sub assembly & fitting of the reservoir tanks & battery & also the fitting of the rear mudguard unit. Stage 15 showed no problems bar a little filler on the battery, but the fun comes in stage 16 when you try to fit it inside the frame.  Great care & patience is needed as it is tricky to fit the reservoir unit through the frame & locate it on the three support arms. You must guide it slowly in & manoeuvre it around the front pins so that it sits level. The rear mudguard fits in with no problem & is secured by two screws, but do not over tighten these.
Reservoir tanks and battery fitted

Rear mudguards fitted to 1/6 Harley Davidson
STAGE 17
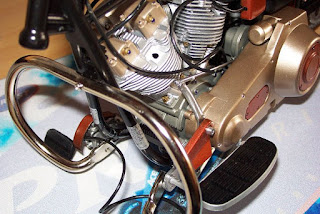
No problems here just do not over tighten the screws when fitting the front bar.
Front bar fitted to 1/6 Harley Davidson

Foot rests and front bar fitted

STAGES 18 to 20
I found that a small amount of superglue on the metal rear shocker covers helped as in this kit as they kept coming loose, may be better in the proper Tamiya kit. Following my colour scheme, I sprayed the stage 19 in  Gold after filling & sanding the joint of parts P7 & G24.

STAGE 21
The only thing to take care with is not to overtighten the screws holding the rear shockers & support bars for the paniers as if you try to tighten them too much the bars will try to push out from under the shockers.  The nuts & bolts on the rear wheels & support beam were highlighted in Gold & Purple.

Rear shock absorbers fitted to 1/6 Harley Davidson
STAGE 22
No problems just the chrome was sanded off & then re-sprayed to follow my paint scheme.

STAGES 23
What fun, NOT!!!! Part T6 had a major fault with being moulded incorrectly as was totally useless.  This would have made the whole assembly useless, so time for a quick alteration.  I glued a 3mm nut to a piece of plastic & reshaped it to match the faulty piece. 
Rebuilt top section of seat mountings
This was then glued to the frame T4 allowing me to continue with the sub-assembly of the seat suspension & paint it black.
All the seat parts of 1/6 Harley Davidson painted

Completed 1/6 Harley seat frame


Saturday, 11 February 2017

1/48 Zaku II - Part 5

Time to do some work on the hip joints & lower skirt. The main section is just two pieces with two poly caps to fit the side skirts to.  This was filled, sanded & primed with Duraluminium.
Hip joint painted duraluminium on1/48 Zaku II
Hip joint painted Duraluminium
 The front & back armour & skirts were primed in grey,
Front & rear armour primed

then allowed to dry fully followed by fine coats of U.K. Azure Blue as the second blue shade I’m using. 
 While the armour dried I went back to the hips & using “Metal Color” Steel, Burnt Iron, copper & Ammo Of Mig Brass on some of the fixing points & recesses to bring out the details. 
Two more poly caps went in the front of the unit & the painted front armour.
Detail work on hips & front armour fitted on 1/48 Zaku 2

 The rear armour just pushed into place & following the same detailing as the legs used small amounts of Gun Metal Grey in the recesses.
Finished rear armour now fitted

Friday, 10 February 2017

Part 1 :- 1/6 Harley Davidson FLH Classic

Back in 2007 I made this kit before the days of having an airbrush and only a low budget digital camera. Got another one of these in my stash to make, so will be nice to see if I approach things in another way.

This was a "Newstar" remake of the Tamiya Harley Davidson and I knew the bike was going to be big by the size of the box & I was not wrong when I looked inside.  After my initial pleasure, I noticed that all was not well. with closer look at the sprues I could see some very serious problems to come.
Some of the "chroming" had not worked on one of the sprues & faded to its natural black plastic colour, some of the other chrome parts were scratched & some other coated parts had either a lot of "flash" or obvious mould lines
Flash on the some parts of the 1/6 Harley Davidson
Mould "flash" on some parts
Poor Chrome effect on 1/6 Harley Davison
Poor Chrome effect on some parts


My wife’s idea was do a bright and mad "Custom" paint job on the bike as it will allow me to remove all the seam lines & scratches & give a personal touch. A quick walk to a local Halfords & with Sarah's help we chose a metallic red for the main parts like the tank, mudguards, etc. and a dark copper & a pale gold scheme for the old chromed parts married to a black frame.  
  
FRAME ASSEMBLY:- Parts 1,2 & 3
Please note the area marked to be removed to fit the rear foot rests later on. The only problem I had had was with part No.N8 that had a nasty seam line, so out came the sanding sticks & I decided to paint it the same colour as the frame.

Areas to be cut off and left on the frame of 1/6 Harley Davidson
Areas to be cut off and left on the frame
The chain in section 3 was painted in Tamiya Metallic Grey & given a black ink wash to bring out the link detail. I then sprayed the frame in gloss black & the completed suspension arm in satin black. I did not fit parts F7 & F8 as these were to be painted in the custom colours later. 


Chain and rear suspension arm fitted 1/6 Harley
Chain and rear suspension arm fitted
ENGINE ASSEMBLY:- Parts 4 to 7
As the engine covers (Part No. L4 & L16) were going to be re-painted I built these up & put them aside. I built the cylinder cases without the bolt detail or spark plugs, as this will go on after spraying. The crank case minus the cover & oil pump was assembled with seam lines removed ready for spraying.  The crank case was done in Tamiya Metallic Grey, the cylinder head in Tamiya Chrome Silver & the rocker covers & case cover in Sovereign Gold.


Engine parts of 1/6 Harley painted
The push rods were also sprayed in the gold & the engine assembled.  All the bolt details were painted in to help follow the theme & some of the other bolt heads were highlighted in purple.


Completed 1/6 Harley engine block
Completed Harley engine block
STAGE 8
With using our chosen scheme, I sanded off the chrome from the drive train covers, primed and painted them in the Gold. The gearbox unit was painted in Metallic Grey & the piping fixed with a small amount of superglue.

1/6 Harley Davidson gearbox cover painted in Gold
Gearbox cover painted in Gold
STAGE 9
The decals were fixed on the frame & the engine mounted in place as well as the gearbox unit.
Engine and gearbox mounted in the Harley frame
Engine and gearbox mounted in the frame

STAGE 10
The sub assembly section in part 10 where the stand spring is fitted has a problem where no fixing hole has been drilled. I used a 0.3mm drill so that the spring hook would fit in the stand arm. The cover (G14) was painted in copper.  I would fit this unit to the frame & attach parts L23 & L33 before fitting the gearbox cover assembly you made in stage 8 as the locating pin for part L23 will be obscured.

Fitted gearbox cover and piping to 1/6 Harley frame
Fitted gearbox cover and piping