Sunday 29 January 2017

1/48 Zaku II - Part 2

I've given the sanded upper feet a touch up of primer, then masked off the ankle joint to give a final spray of light grey on the foot.For detail I used some Gun Metal Grey to represent bolts. For the foot base I did some detailing with Duraluminium, Magnesium & Brass.
Painted feet of 1/48 Zaku II
Upper feet and soles painted on the 1/48 Zaku II

When dry the 2 parts of the feet snapped into place with no glue.


Finished feet on the 1/48 Zaku II
The feet went together without any glue
The lower leg is mainly 2 large pieces, so I am going to do this as a complete unit to ease in painting.  The 2 side pieces have poly caps fitted inside, and then glued them to make sure they will bear the weight of this large kit. The 2 rear engine Vernier parts were glued in place. The seam lines were sanded & filled before priming.
Primed lower legs for the Zaku II
Lower legs of the Zaku II primed

Now comes the part where I can begin to give the legs some colour & detail as with this being a kit without an inner frame & a lot of moulded in detail the paint job needs to bring a lot of this out.

The legs were sprayed in the darker of the 2 blue colours I’m using which is UK Mediterranean Blue from Vallejo & 3 good light airbrush coats did the trick. To bring out the detail of the rocket verniers I  hand painted the recessed areas in “Metal Color” Steel, the verniers in Duraluminium then the inner section of the Vernier in Burnt Iron.
Using a cocktail stick I put very small amounts of Gun Metal Grey in the bolt holes & recesses on the leg, then as a final touch used Aluminium on the small vanes on the side of the legs.
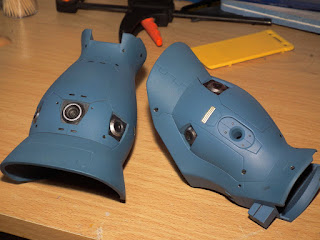
Detailed painting on legs of Zaku II
1/48 Zaku II details now painted on the legs

The whole unit was put safe wrapped up for final fitting later on.


For making the knee joint I did not follow the instructions but made each one like a standard model kit.  Part (F9) was primed & then painted in Duraluminium, poly caps were fitted inside this, the inner part of one of the knee joints (F2) and then the unit goes together with the other side of the knee joint. The completed sections were primed then painted to allow them to dry.
Base aluminium colour sprayed onto knee joints of Zaku II
Knee joints of Zaku II painted
 

1/48 Zaku II - Part 1

The 1/48 Zaku II is in the “Mega size” range from Bandai, but the kit itself does not have that many parts & the inner frame does not have that much detail compared to say a PG or even an MG Zaku.   That being said it was nice to use it for a practice bed on some ideas on paint schemes & effects without having to worry about ruining an expensive kit.
The instructions show a lot of the sprues are designed to snap together before the parts are removed, but as I will be filling & painting the kit I’ll stick to the more standard way of making a model.
A lot of this kit will be primed using a method I found works for this kind of plastic where a light spray of Halfords car primer is put on first, then a very light sand & clean before Vallejo primer goes on top.


The first area I started on is the soles of the feet. The bottom sections are made of just 2 parts & after fitting were given the Halfords undercoat then Vallejo Black primer to give a satin effect.  
Feet of Zaku II primed in black paint
1/48 Zaku II soles painted black
The ankle joint is going to have some detail painting done later, so to start with I made the ankle joints as shown in stages 7 & 8, but please pay attention to how parts G2 & G3 go on the ankle as the larger piece must go on the front facing end.
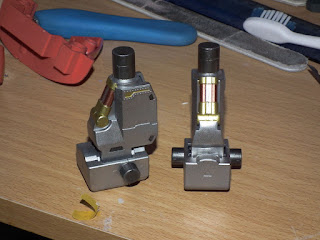
These were undercoated then painted in Vallejo “Metal Color” Duraluminium.


Ankle joints on Zaku II finished & 1st paint coat
1/48 Zaku II ankle joints primed
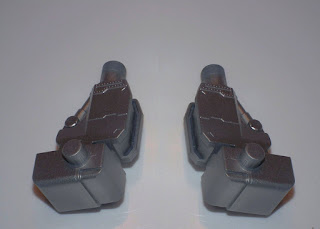
Looking at the pieces they needed a bit of detail painting done just to enhance them. I used some Vallejo “Metal Color” Steel , Copper & Ammo Of Mig Brass on the pistons, recesses& fixing joints.


Detail added to ankles of 1/48 Zaku II
1/48 Zaku II ankles now had detail added


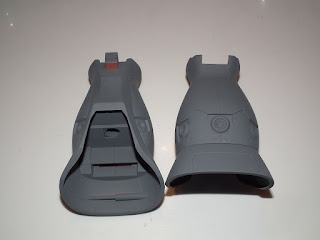
The upper parts of the feet were primed on both sides & the detailed ankle joints put in with the poly caps. When I looked at the feet I was not happy with the size of gap in the joints and I used my normal plastic filler & after sanding checked to see how it was looking.
Sanded & filled lower feet on 1/48 Zaku II
Filled and sanded feet for the 1/48 Zaku II 


To me it just needed the final touch of some very thin superglue to go over the filler & that will then seal any micro holes to give a very smooth finish for priming again later.