Fitting the rear trim bars (Stages 34 & 35)
These were primed then painted to match the rest of the bike. The best way I found to set them up was to at first only glue the top set to the rear support (see diagram below), then just using H12 to keep the correct space, fix the rear of P3 & P4 just the same. A bit of super glue at the front four points holds it with the correct spacing for the bars.
This may seem long winded, but it allowed each stage to dry as the support pins at the rear are very small & if you try to glue both ends at once they may come loose. It also gives the correct distance between the bars.
 |
| First fixing position of side bars |
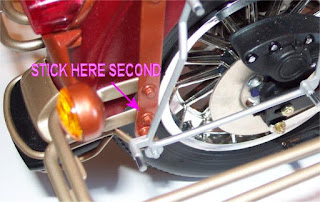 |
| Second fixing position of side bars |
 |
| 1/6 Harley Davidson side bars now set |
The side boxes were then glued into place & left to set fully.
Fitting exhausts (Stages 33 to 35)
I removed all the chrome from the exhausts, then painted them in gold and matt black. I thought it better to fit the pipe in stage 35 first as it gave a solid fixing for the pipe in stage 34. I carefully fed the assembly in at a slight angle to get close to the outlet then turned it level into the outlet holes. I then screwed the rear pipe in place & left to set.
When you fit the exhaust to the pipe put a small amount of glue at the junction of the pipe & exhaust to fix, screw it into place.
 |
| Left side exhaust fitted |
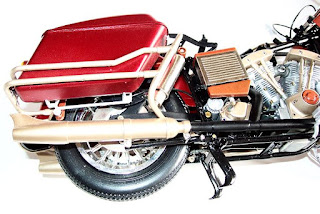 |
| Completed right side exhaust fitted |
Here are two more photos showing the exhausts & side boxes in place ready for the next stage of building.
 |
| View of completed rear section of 1/6 Harley Davidson |
 |
| View of rear section of 1/6 Harley Davidson |
Fitting the top box ( Stage 46 )
No trouble with this. The box needs no glue at all as it clips into place on the support bars.
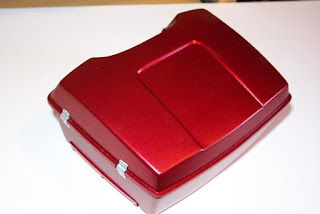 |
| Completed top box |
 |
| 1/6 harley Davidson top box clipped into place |
Making the fuel tanks (Stage 38)
These needed a lot of filler at the seams, which were sanded down, primed & sprayed in "Canyon Red" The parts G20, N22 & N23 were sanded, painted in the gold colour & glued into place ready to be fitted to the bike later.
 |
| Large seam gaps in 1/6 Harley fuel tank |
 |
| Finished and painted 1/6 Harley fuel tank |
Seat build & fitting
I followed the instructions for making the rear seat, but using the colour scheme of the bike. The seat padding was painted satin black.
 |
| Seat for Harley Davidson now finished |
Air intake fitting
The air intake was painted in copper to match the bike colours. First I fitted the connection pipe to the engine, let it set, then connected the piping & finally fitted the intake using superglue so it would not "sag" or move.
 |
| Painted air intake on 1/6 Harley Davidson |
Fitting the throttle controls
One very large gripe here!! The controls are made with a rubbery plastic, so no glue I have will hold them together, married with the way of holding them with the mirror stalk/clip does not work.
I had to devise a way to keep them connected so I came up with a "wire" system. It worked for me so here's how I did it.
I made two 0.5mm holes in both of the parts that hold the levers and fed a thin wire between them. I also drilled 4 holes in the small part which connects to them to receive the wires. The controls were painted & fitted ready for the next stage.
I fed the wires through the connecting piece and bent the wires over ready to fit to the handlebars. I pushed the units onto the handlebars, followed by the grips to get the correct position, then twisted the wires till they were tight, cut the ends off & painted them black to disguise the copper wire.
 |
| Fine fixing wires on hand grips |
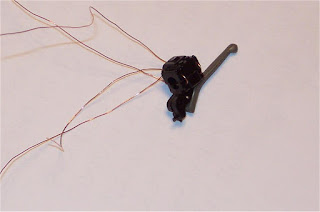 |
| Wire now holds the 1/6 grips together |
 |
| Brake handles now fitted to handlebars |
 |
| Close up of 1/6 Harley brake handles |
Fitting the fuel tanks (Stage 38)
OH NO!! that dreaded rubbery plastic again & no glue I had will stick it so I followed the throttle plan by drilling four holes in one of the tanks, fed wire through & fastened underneath. This way no wire will show on the top of the tanks & as you can see fits fine on the model. See the series of photo's below to how it was done.
 |
| Small holes drilled in 1/6 Harley tank |
 |
| Fine wire goes through 1/6 Harley tank |
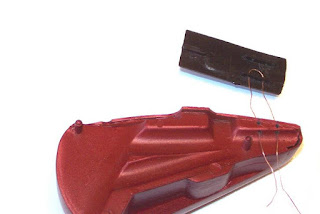 |
| Wire fitted through rubber cover |
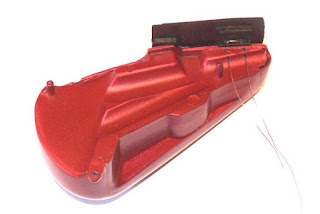 |
| Rubber cover now secure on 1/6 Harley Davidson tank |
I then glued this half of the tank in place & allowed to set.
Making & fitting the gauges
No trouble with this stage and they just clip into place on the handlebars.
 |
| Completed 1/6 Harley Davidson gauges |
 |
| Completed gauges on the handlebars |
Lights & front fairing
I sprayed the front lights outer parts, then built them up with the clear & coloured lenses. Superglue was best to fix them to the fairing supports. I used superglue as normal plastic would take a while to set & you need to get the angle correct.
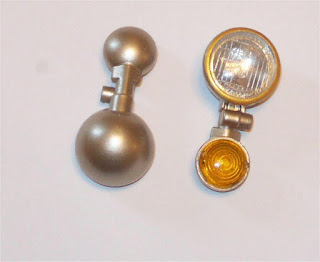 |
| Harley Davidson front lights and indicators |
The windshield screws into the fairing supports as shown in the diagram, but give it a clean beforehand.. The fairing should then push into the support, but mine looked out of postion as there was a gap between the top of the headlight & the bottom of the fairing, so I cut the lugs off the fairing & glued the base to the headlight. As you can see this, to me, looks better & is how it should look on a real bike.
 |
| Wind shield and screen fitted to 1/6 Harley Davidson |
Finishing the fuel tanks
I fitted the spark plugs & connected the ignition wiring. I then glued the other side of the tank on with the rubber resting between the two. I also fitted the clutch pedels after they were painted copper & black. The central guage unit was painted copper, the transfer & other parts added. This was then fitted to the top of the tanks.
 |
| Finished fuel tanks on frame of 1/6 Harley Davidson |
Finishing off
All that needs to be done now is to fit the fragile items like the mirrors & put the fuel caps on. I looked at putting the decals on the tanks & boxes, but they were offline, had white lines when lifted off the backing paper so they were left off. So at last there it is in all its glory to go on the display shelf.
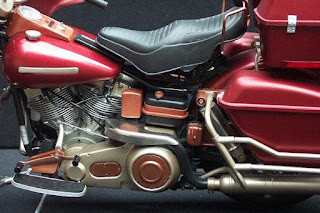 |
| Finished 1/6 Harley Davison picture No.1 |
 |
| Finished 1/6 Harley Davison picture No.2 |
 |
| Finished 1/6 Harley Davison picture No.3 |
 |
| Finished 1/6 Harley Davison picture No.4 |


